A slow page load time can have a significant impact on your website visitors. In fact, according to Google, 53% of your visitors are likely to leave your site if your pages take more than 3 seconds to load.
Also, it is well known that a slow website will have a negative impact on your site’s SEO ranking. This is more evident now with the introduction of Core Web Vitals signals as ranking factors by Google.
Therefore, you must optimise your website to improve speed and performance. You should always start this process from the inside out, that is, starting from your website code, then optimising your multimedia assets, software, server components, cache systems, and so on.
Once you’ve done all of this, it’s time to look for additional tips and strategies to increase your page load performance.
One of the services that you should consider adding to your website is Cloudflare.
What is Cloudflare?
Cloudflare is generally known as a CDN (Content Delivery Network). But it is much more than that. Cloudflare defines itself as a “global network designed to make everything you connect to the Internet safely, private, fast and reliable.” Using more colloquial terms, we could define Cloudflare as a service that helps make your website faster and more secure.
Let’s dive into the top ten reasons to use Cloudflare on your website:
1. It’s FREE.
Cloudflare works on a Freemium model, but the free plan will work for most users.
With this plan, your website will be protected and accelerated.
If your business has more demanding support requirements or needs, Cloudflare has you covered with one of their paid plans.
2. Pretty simple and intuitive setup
Cloudflare requires no additional hardware, software, or code changes. Essentially, just point your nameservers to Cloudflare, and you’re good to go.
Let’s look at this in more detail:
- To get started, you just need to create an account with Cloudflare and enter your website URL.
- Cloudflare will show you the different plans available. The free plan is under the 3 paid options. You can choose this to start.
- Cloudflare will then scan your domain and list the DNS records it has found for your domain. At this point, you need to verify that what Cloudflare has found matches the DNS records you have with your domain registrar. You can do this by opening another browser window, logging into your DNS provider, and finding where your DNS zone is managed. Cloudflare is usually very accurate in collecting all your domain records. Still, if you see something Cloudflare missed, you can manually add it to your interface by copying what you have on your registrar provider.
- Once you are happy with the DNS records found by Cloudflare, click “Continue”, and Cloudflare will display the nameservers that you need to change at your domain registrar for Cloudflare to manage your DNS records. This may seem scary, but it is very easy to set up. Cloudflare will provide you with the old NS records with your current registrar and the new ones you need to put instead. If you have difficulty finding your NS records, you can simply Google how to find them at your given registrar. Or you can contact your registrar’s support and get their help.
- Once you confirm that the NS records have been updated, Cloudflare will scan your domain, and once they confirm the changes are visible, they will show your website name in the Cloudflare dashboard as active.
- You are done now. If you click on your website name in the dashboard, you will see an internal panel with many additional tools that you can configure.
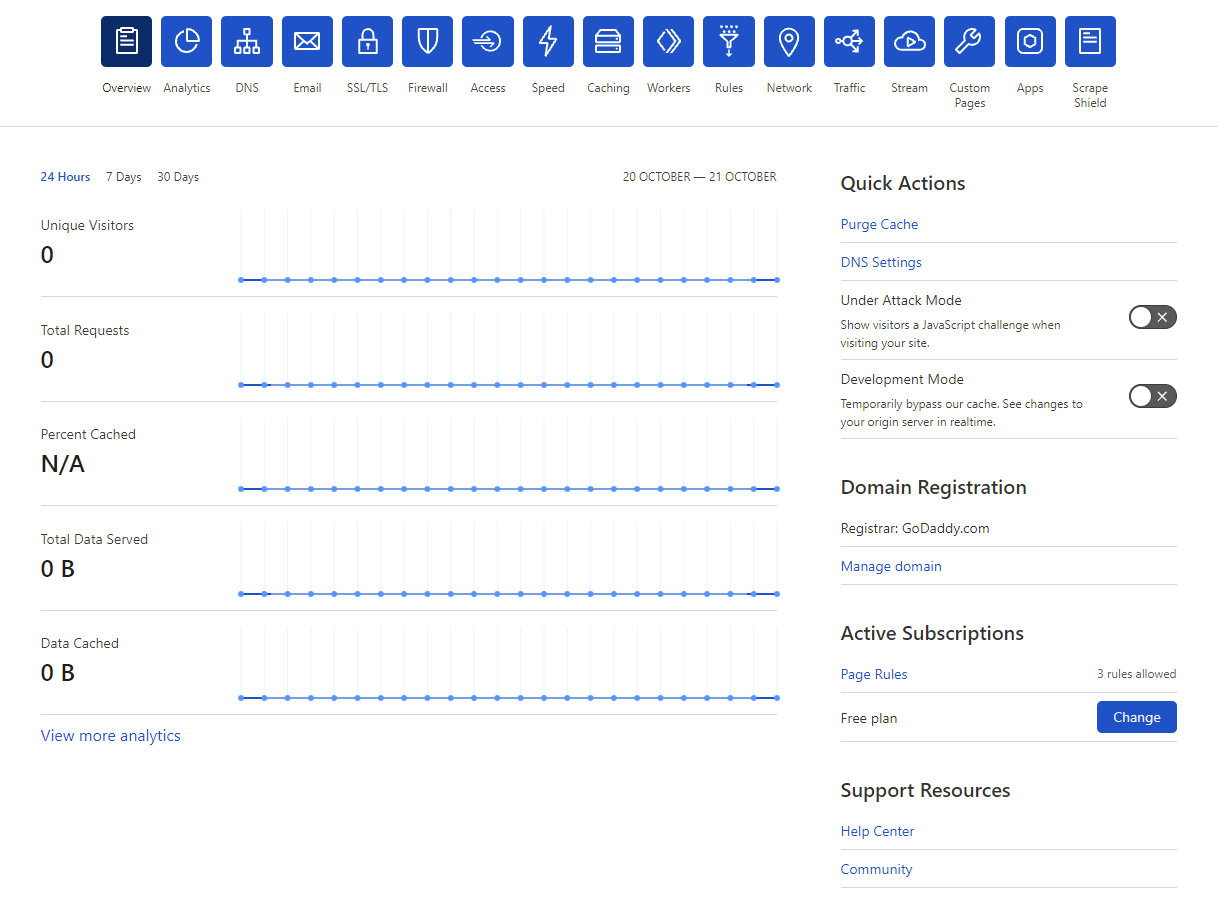
3. Easy DNS management
Unlike many other domain providers, where DNS records are often difficult to find and change, this process is a breeze at Cloudflare. You have the DNS button in the upper area within the dashboard and once you access the DNS management area, the interface is very easy to use.
You can easily add additional DNS records as needed, for example verification records for Google Webmaster Tools. They update DNS changes quickly, usually within a few minutes.
And, if you want to disable Cloudflare on your website, this is also an effortless thing to do. Click the “DNS” button in your website Cloudflare dashboard. Then you just need to click on the orange cloud of your top A records pointing to your server IP, which will cause your domain to bypass all routing from Cloudflare.
4. Your website is faster
When a visitor requests a page from your website, this request goes from the visitor’s browser to your web server. The visitor’s browser will download all assets related to your web page (HTML, CSS, JS, IMG) from your server. Without any caching mechanism in place, this process will be repeated every time a browser accesses that same web page, putting overhead on your web server.
When you add your website to Cloudflare, Cloudflare stores a copy of your website content in their globally distributed data centres.
This means that when a user accesses a page on your website, they are likely to receive a copy of your website assets stored in the nearest data centre without having to request it from your physical web server.
The result of this is that the user can see the content of your page much faster, and your web server is freed from the additional requests that it would receive to the server for static assets.
The best part about this is that you don’t have to do anything. Cloudflare takes care of this for you.
5. Your website is more secure
When you add your site to Cloudflare, you will see that the primary records in your DNS area have an orange cloud next to them. When your DNS records are orange-clouded, Cloudflare speeds up and protects your site.
The first level of protection is that Cloudflare hides your server’s real IP address from the public. When your server’s IP address is exposed, your server is more vulnerable to direct attacks. When traffic is transferred through Cloudflare, your real server IP will be hidden from the world, minimizing the chances of receiving a direct attack on your server.
Additionally, Cloudflare also blocks threats and limits abusive bots and trackers from wasting bandwidth and server resources.
6. Cache management
As mentioned above, Cloudflare will store local copies of your website static assets across their global network, so these are delivered to local users faster when they access your website.
Additionally, Cloudflare offers an easy way to cache your static assets.
If you click the “Caching” button on the top bar and click “Configuration”, you will see the available cache options. Here you can do things like purge the cache so that Cloudflare will regenerate all cached files. This is useful when you have changed your website and don’t see it appear in your browser. Purging the cache will refresh all cached files, so your changes to CSS, JS, Image HTML will be updated.
In this interface, you can also determine the “Browser cache TTL”, that is, the amount of time that Cloudflare instructs a visitor’s browser to cache files. During this period, the browser loads the files from its local cache, which speeds up the page load.
7. Further FREE optimisations
Click on the “Speed” button on the top bar and then on the second tab “, Optimization”.
Here you will have access to many optional paid tools that you can configure to optimize your website speed further as required.
However, with the FREE plan, you also have some exciting options, such as
- “Auto Minify”: You can decide if you want to reduce the file size of the source code (HTML, JS, CSS) on your website. Each option can be individually enabled/disabled.
- “Brotli”: You can activate this compression mechanism, which will speed up page load times for your visitor’s HTTPS traffic.
- “Rocket Loader”: This helps improve the paint time of pages that include JavaScript.
Warning: To avoid getting unexpected results, I recommend that each setting you change in this step be followed by emptying the cache (check the previous section) and testing the website. This way, you will make sure that your changes are having a positive impact on your site. And if something breaks, you will know what caused it.
8. SSL
Using SSL is an essential ranking factor for search engines. Additionally, browsers such as Google Chrome and Mozilla warn of insecure sites when visiting a website that does not contain an SSL certificate. This can cause some users to leave your website because they feel that it is unsafe to navigate.
If you still have a website that works without SSL, you are making a big mistake, especially when there are SSL certificates that you can use for free.
Cloudflare offers a free SSL certificate for your site that can be activated in a couple of clicks without verification or wasted time like traditional SSL.
To set the right SSL options for your website, there isn’t a general formula. Depending on your website and hosting level of access, you may be able to set one option or another within Cloudflare.
I recommend that you start as follows:
- Go to the “SSL/TLS” button on the top bar and select the FLEXIBLE option.
- Click on the second tab, “Edge Certificates”, and activate the options “Always Use HTTPS” and “Automatic HTTPS Rewrites”.
Here you may need the assistance of someone technical in case you are not because some configuration options might benefit from changes within your website or your server. For example, if the above steps don’t work for you or you see some errors on your site, you may want to generate an SSL certificate within Cloudflare and install it on your server. Or you may want to replace all your website URLs from HTTP: to HTTPS:
Warning: Any changes you make here should be followed by clearing your website’s cache, Cloudflare cache and testing it through a browser. If you see any unexpected results, you can reverse the last step you did.
9. Cheaper registrar
Cloudflare also offers domain registration services. This means that you can register and transfer your domain registration to them.
Cloudflare Registrar supports common top-level domains (TLDs), including .com, .net, .org, as well as hundreds more. Therefore, it is very likely that your existing or desired domain can be transferred or purchased through them.
If you already have a domain registered elsewhere, why should you transfer it to Cloudflare? The two main reasons would be price and simplicity. With other registrars, it’s not uncommon for you to pay a low fee for domain registration for the first year but then start paying a much higher fee for each renewal. Or find that they include additional necessary features at an additional cost.
Cloudflare’s registrar pricing is “at cost”. This means Cloudflare charges you exactly what they pay for registration, plus any applicable ICANN transaction fees.
To register or transfer your domain to Cloudflare, click the “Registrar” link found in the top menu of your Cloudflare account.
In addition to this, the Cloudflare registrar also offers DNSSEC as a free add-on. DNS is a fundamentally insecure protocol. It does not guarantee where DNS records come from and accepts any request sent to it. The solution is a protocol called DNSSEC. DNSSEC creates a secure layer for the domain name system by adding cryptographic signatures to DNS records.
Activating DNSSEC is very simple:
- Go to the DNS section of your domain within the Cloudflare dashboard.
- Scroll down until you get to DNSSEC.
- Select Enable DNSSEC.
Note: Cloudflare Registrar only supports domain transfers that are active on Cloudflare. This means that you may need to add your website to your Cloudflare account first before transferring the domain registration to Cloudflare.
10. Decent analytics
Cloudflare has an excellent analytics interface that informs you about the performance of the CDN, the number of page visits and pages crawled, the amount of bandwidth saved by using Cloudflare, and many other features such as statistics of protection against attacks against your website.
All this without having to install any additional script on your website.
Wrapping Up
Cloudflare is a great addition to any website. As you’ve seen before, adding your website to Cloudflare is a straightforward process, and most of the benefits you get are out of the box, meaning you don’t have to do anything.
Bonus 1: WordPress plugin
If like 35% of all websites on the Internet, you are using WordPress on your website. You can also connect your WordPress website to Cloudflare using the free Cloudflare plugin. With this, you can manually purge the cache of the CMS, and you can enable/disable some of the other features mentioned above.
Bonus 2: Crawler Hints – instantly index your web content in Bing and Yandex
Using Crawler Hints, websites can now notify search engines whenever content on their site is added, updated, or deleted. Together with Microsoft and Yandex, Cloudflare can improve search engine infrastructure, origin server performance, and the Internet as a whole. Cloudflare is now offering free crawler hints to all its customers. Clients can take advantage of these more efficient crawls. A website owner can use IndexNow to instantly notify search engines about the latest updates to their content with the click of a button.
Okay, but what is IndexNow exactly? It’s a new protocol developed by Yandex and Bing that makes it easy for websites to synchronise their content with search engines whenever they create, update, or delete content on their site. Search engines crawl and update their index and search results quickly once they have been notified of new updates via APIs.

With an Engineering degree in Business Computing and a passion for travelling, I’ve been fortunate enough to gain international experience working and living in the US, France, England and Spain. My skill set ranges from technical abilities (Programming, Databases, APIs, Architecture, Consulting) to management/business capabilities (Project Management, Strategy, Finance, Lean Startup).